Daily tasks:
- Ask InSend team to turn on product recommendations
- Add product recommendations to Grow Your Email List automation and Abandoned View automation
- Create a substitution with current promotion and add it to Grow Your Email List automation

Ask InSend team to turn on product recommendations
Typically, the product recommendation block is not enabled for all accounts from the start. According to support, this is because the recommendation model needs some time to gather enough data about what people are interested in and buying.
After two months, we had accumulated sufficient data for the recommendation model. So, I took the initiative and sent an application via email to hello@insend.io, providing our account ID and requesting the inclusion of the product recommendation block. Within just a day, I received a response, and now the block is readily available for use in our web forms and emails.
After two months, we had accumulated sufficient data for the recommendation model. So, I took the initiative and sent an application via email to hello@insend.io, providing our account ID and requesting the inclusion of the product recommendation block. Within just a day, I received a response, and now the block is readily available for use in our web forms and emails.

Add product recommendations to Grow Your Email List automation
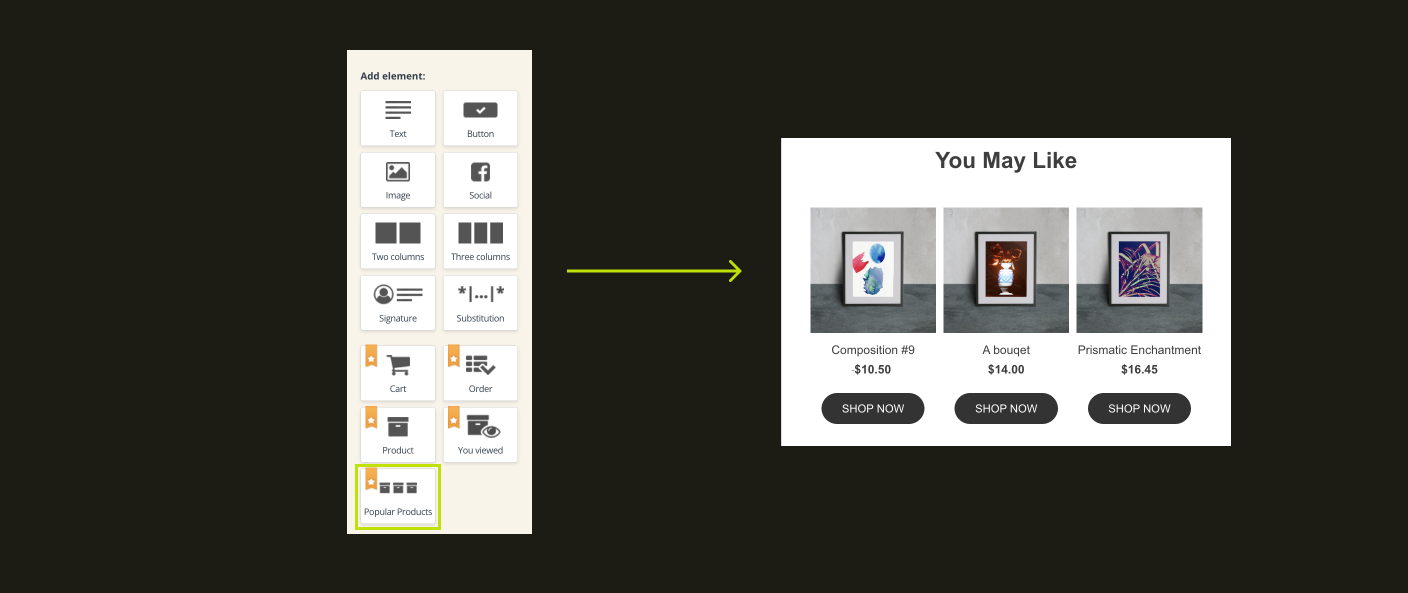
First and foremost, my goal was to integrate product recommendations into the email collection automation and abandoned view emails. The process turned out to be surprisingly simple:
- I started by going into each email where I wanted to include the product recommendations block and paused them temporarily.
- Then, in the content tab, I smoothly added the block containing product recommendations to the left side of the email. I configured it to display two products and made sure it selected the most purchased items.
- Once the changes were complete, I relaunched the emails, and they were good to go with the new product recommendations seamlessly integrated.

Create a substitution with current promotion and add it to Grow Your Email List automation
I also wanted to include information about our current promotions in our emails, specifically the ongoing 20% discount for the second purchase. I found an article in the InSend knowledge base that explained how to create a substitution.
A substitution is an HTML code that can be inserted into multiple emails. By changing the content of the substitution, the changes are automatically reflected in all emails where it's used. This is exactly what I needed, and it's incredibly convenient!
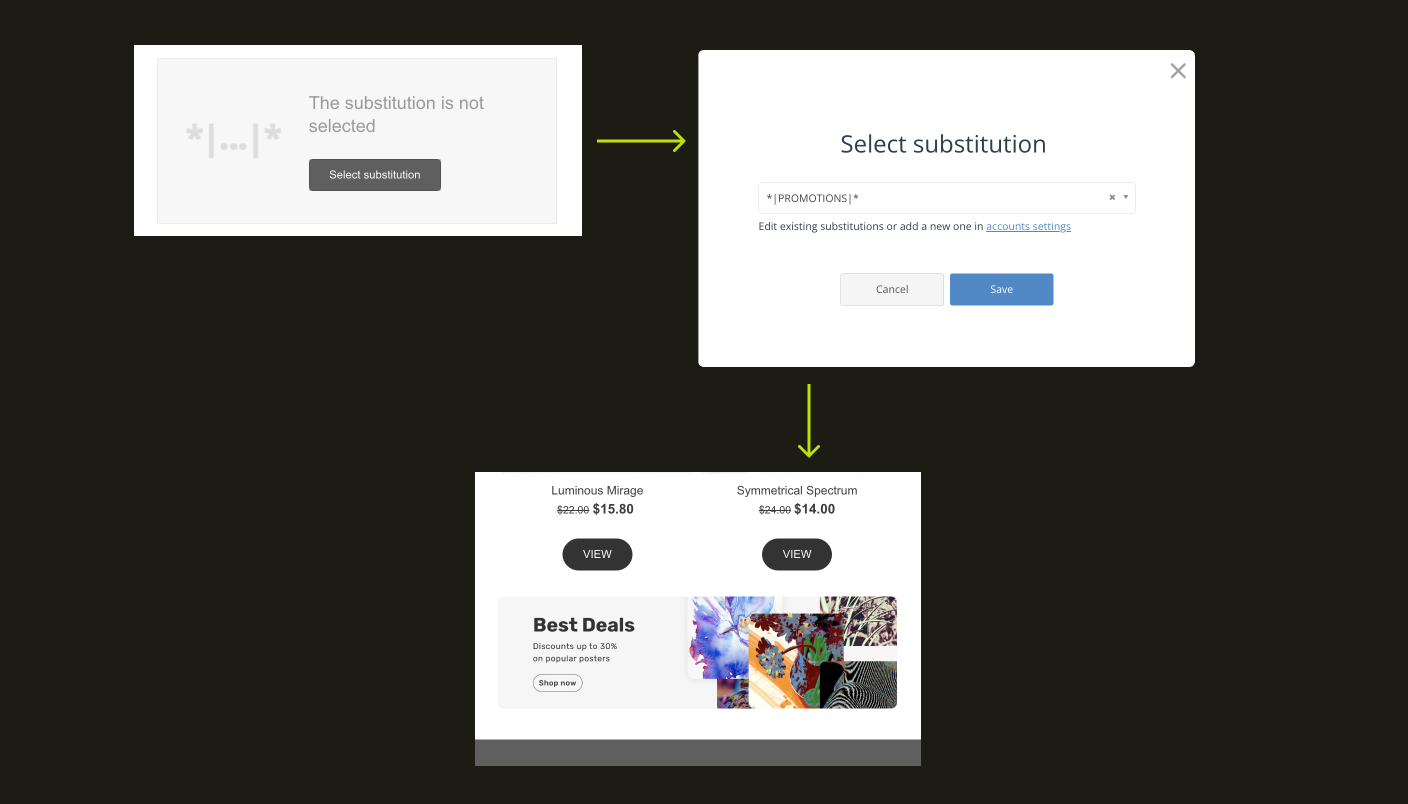
Since I'm not an HTML expert, I decided to visually create the substitution in one of the emails and then copy the embed code from there.
I thought it would be best to make the promotion as an image and specify its URL. This way, when the promotion changes, I only need to update the image URL in the substitution.
Here's how I did it:
A substitution is an HTML code that can be inserted into multiple emails. By changing the content of the substitution, the changes are automatically reflected in all emails where it's used. This is exactly what I needed, and it's incredibly convenient!
Since I'm not an HTML expert, I decided to visually create the substitution in one of the emails and then copy the embed code from there.
I thought it would be best to make the promotion as an image and specify its URL. This way, when the promotion changes, I only need to update the image URL in the substitution.
Here's how I did it:
- I started by creating a new blank email.
- In the content section, I added a block with an image.
- The image was too small, so I clicked on the </> icon at the top of the block to access the code editor. I changed the default width (300) to 100% to stretch the image to the full width of the email.
- Next, I copied the code of this block (mine looked like this <img class="fr-fin" alt="" src="https://dx6i6dhu927v3.cloudfront.net/public/images/2023/7/24/7f5ad36351076e79a2faaf4d21e9cbe0.png" width="100%">).

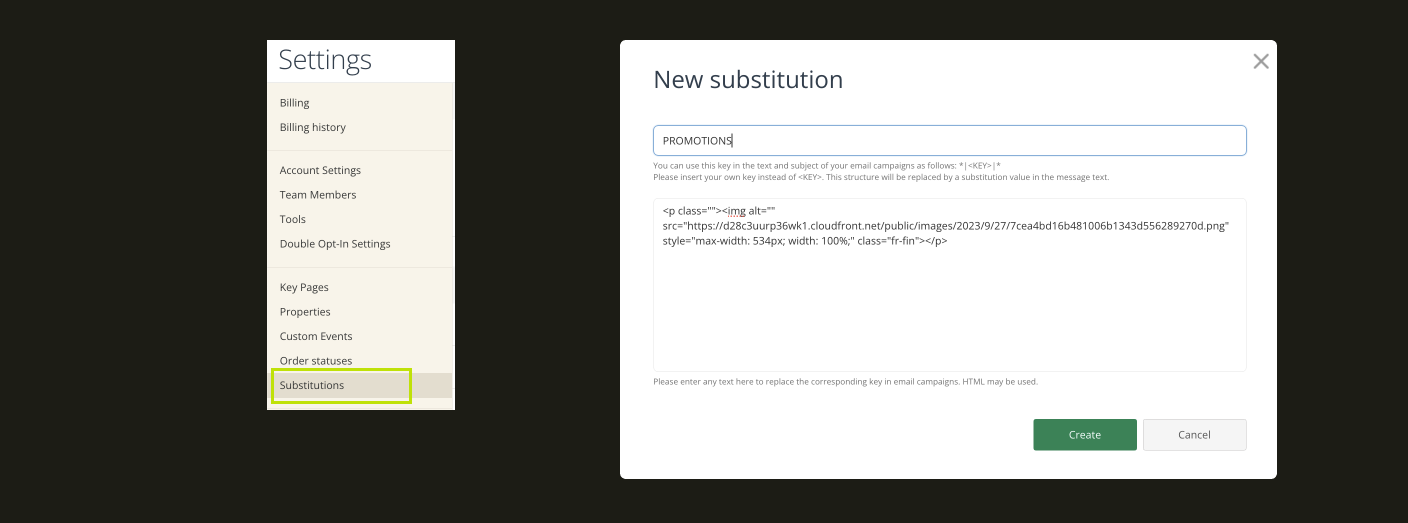
- I then went to the settings and into the substitution section.
- Clicking "create a substitution" in the upper right corner, I selected HTML substitution.
- I named the substitution "promotions" for easy identification and pasted the code from the email. After saving, the substitution was ready to use.
- Going back to my test email, I refreshed the page and dragged the substitution block to the left. I selected my new substitution from the list, and it worked flawlessly.
Now, the final step is to add this substitution to the two automation emails where I want the promotion to appear. I added it to Grow Your Email List automation emails, Abandoned Cart, Abandoned View and After Purchase automations. With this setup, whenever the promotion changes, it will automatically update in both of these emails. It's efficient and saves me a lot of time!