Daily tasks:
- Launch Increase Brand Loyalty automation

Launch Increase Brand Loyalty automation
Earlier this week, I convinced my manager to offer extra birthday discounts to our customers as a way to increase customer loyalty. We agreed that a 20% discount would be a generous gift. Therefore, my task for today is to set up an automation that will prompt customers to provide their date of birth and later inform them about their upcoming birthday, congratulate them, and provide the discount.
Fortunately, there is an existing automation in InSend that I can configure for this purpose. Here's how I did it:
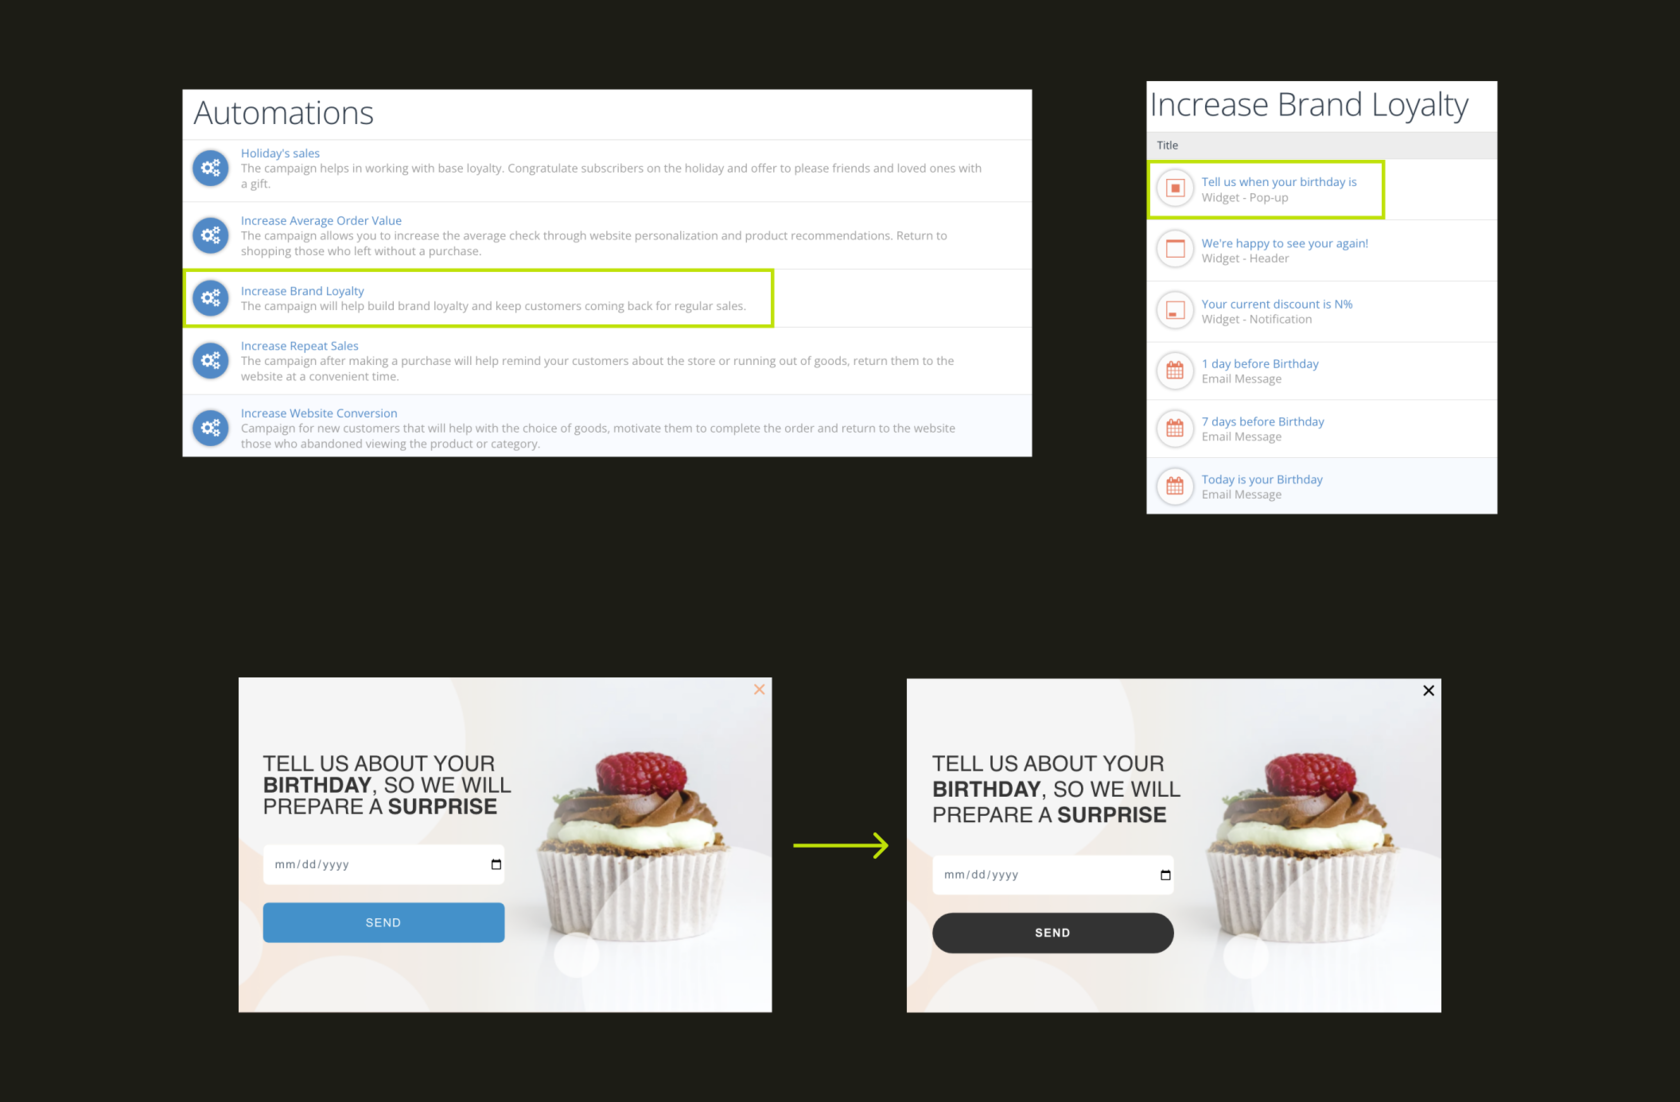
- I accessed the automation section and selected the "brand loyalty increase" automation.
- The first step is to collect the date of birth from our customers. For this, I set up a web form called "tell me when your birthday is."
- I entered the form and found it visually appealing, so I made minor changes such ad border radius, button color and etc. I previewed it to see how it would look on our website.
- The conditions for displaying the form were already ideal, so I didn't make any modifications. I simply launched the form.
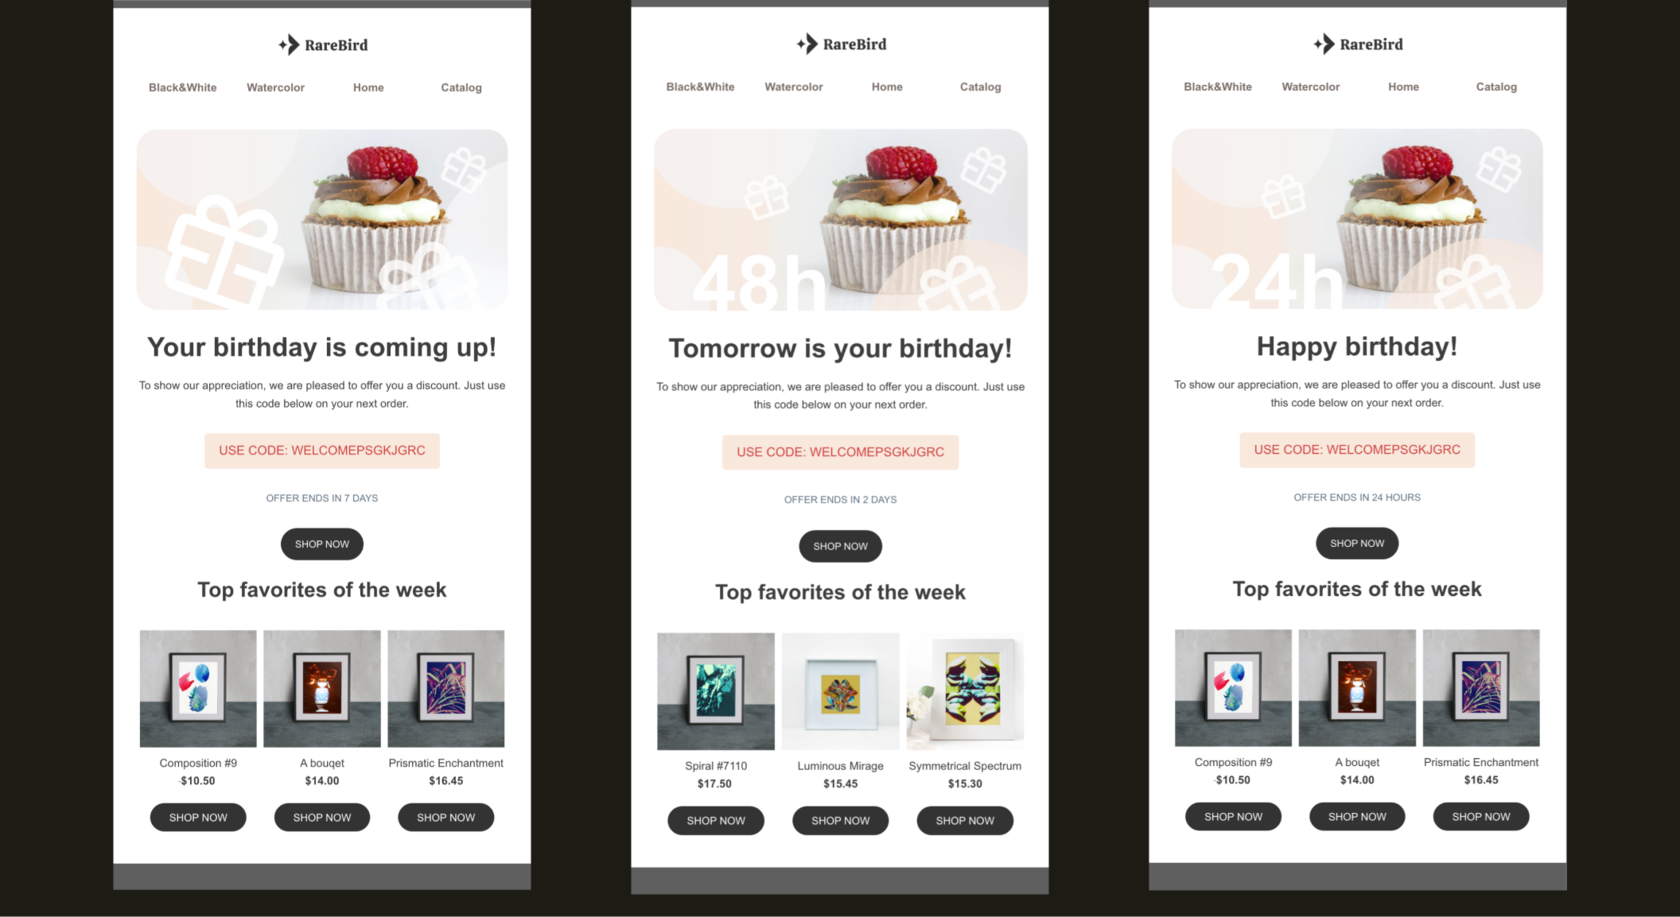
Next, I needed to set up the emails that customers would receive on their birthday. The automation offers to send emails a week before the birthday, the day before, and on the birthday itself. This seemed like a reasonable approach, so I decided to use the standard emails without duplicating them or modifying the sending conditions.
- One by one, I accessed the emails and updated their content, including the logo, categories, text, and a promotional code for the 20% discount. I also replaced the product recommendations with popular products. To ensure everything looked good, I sent test emails to myself.
- After updating the content of all three emails, I checked the sending conditions, updated the sender information, and launched the emails.
Within the automation, I also noticed a small sidebar message that displays the current discount. I thought it would be great to modify it to include birthday wishes and the discount. This message should only be displayed on the customer's birthday.
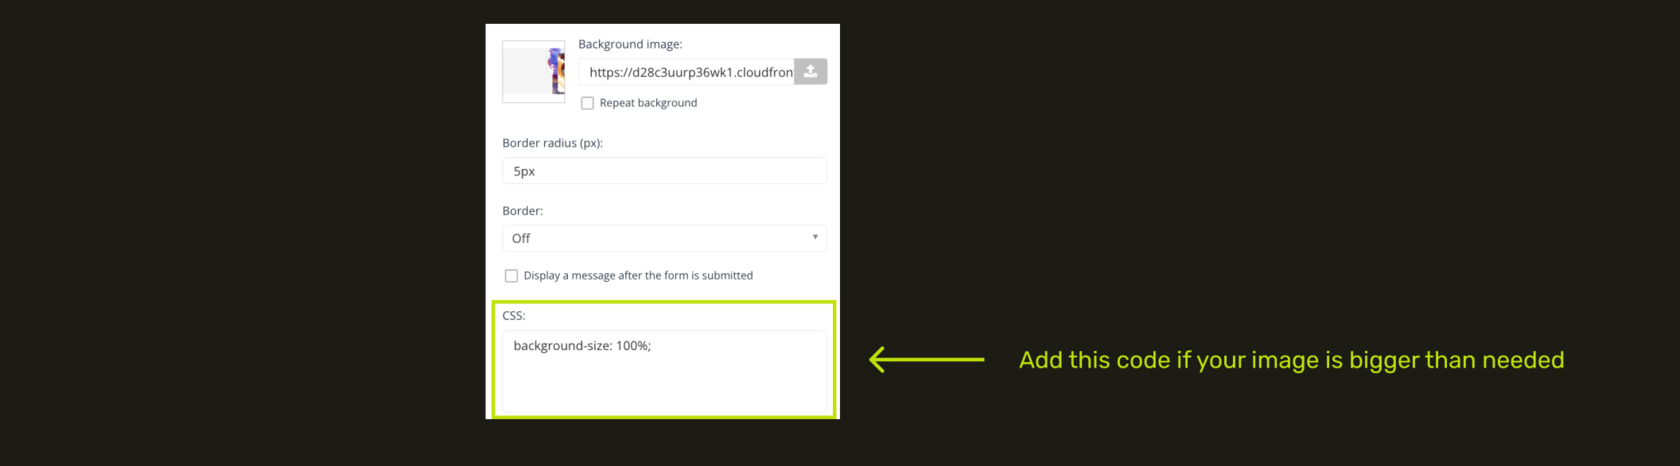
- I made a duplicate of the form and accessed the content section. The current form was small and had a background that didn't suit our needs. I increased the size to 400px width and 300px height. I added a neutral image from our website as the background. In the CSS block, I wrote the following code: background-size: 100%;
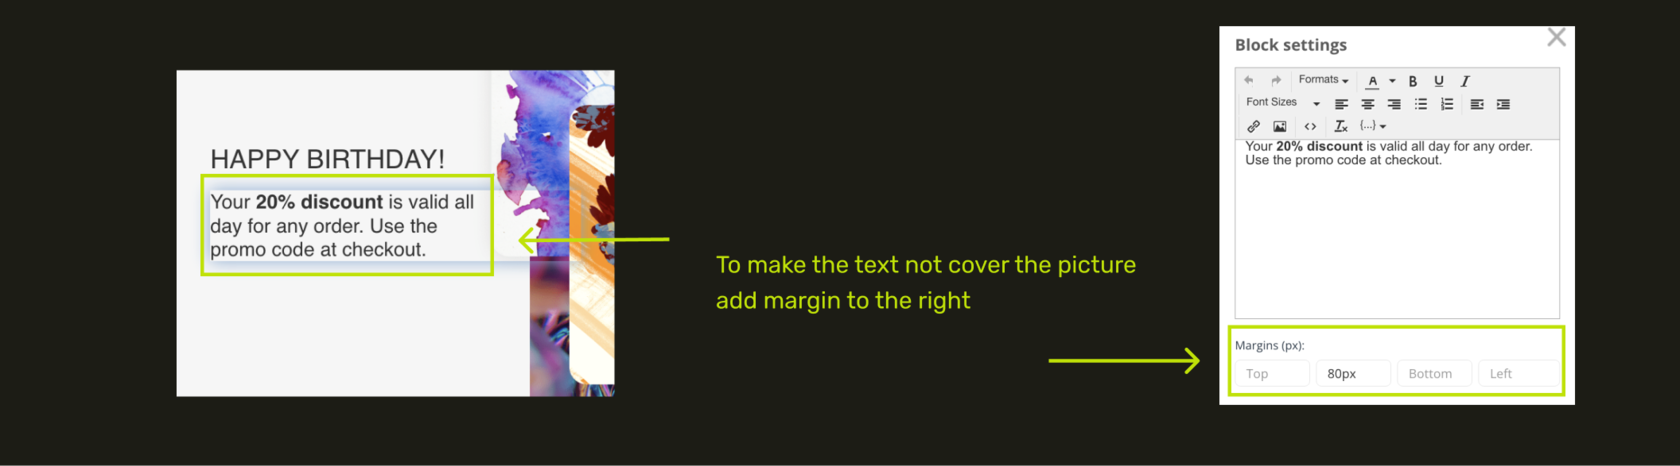
- I replaced the text in the block with "Happy birthday" and aligned it to left. Below that, I added another text block that reads, "Your 20% discount is valid all day for any order. Use the promo code at checkout." To make text not cover the picture on the right, I added 80px at right margin. I also included a text block with the name of the promotional code.
- I moved to the mobile version editing to ensure the form looked good on mobile devices.
- Then, I accessed the display settings and modified one condition: the characteristic - date of birth - days before the anniversary - 0. This means the form will only appear to those who have their birthday today.
- I previewed the web form again and launched it.

Everything seems to be ready now! We will automatically collect birthdays and congratulate our customers.
